How does it work?
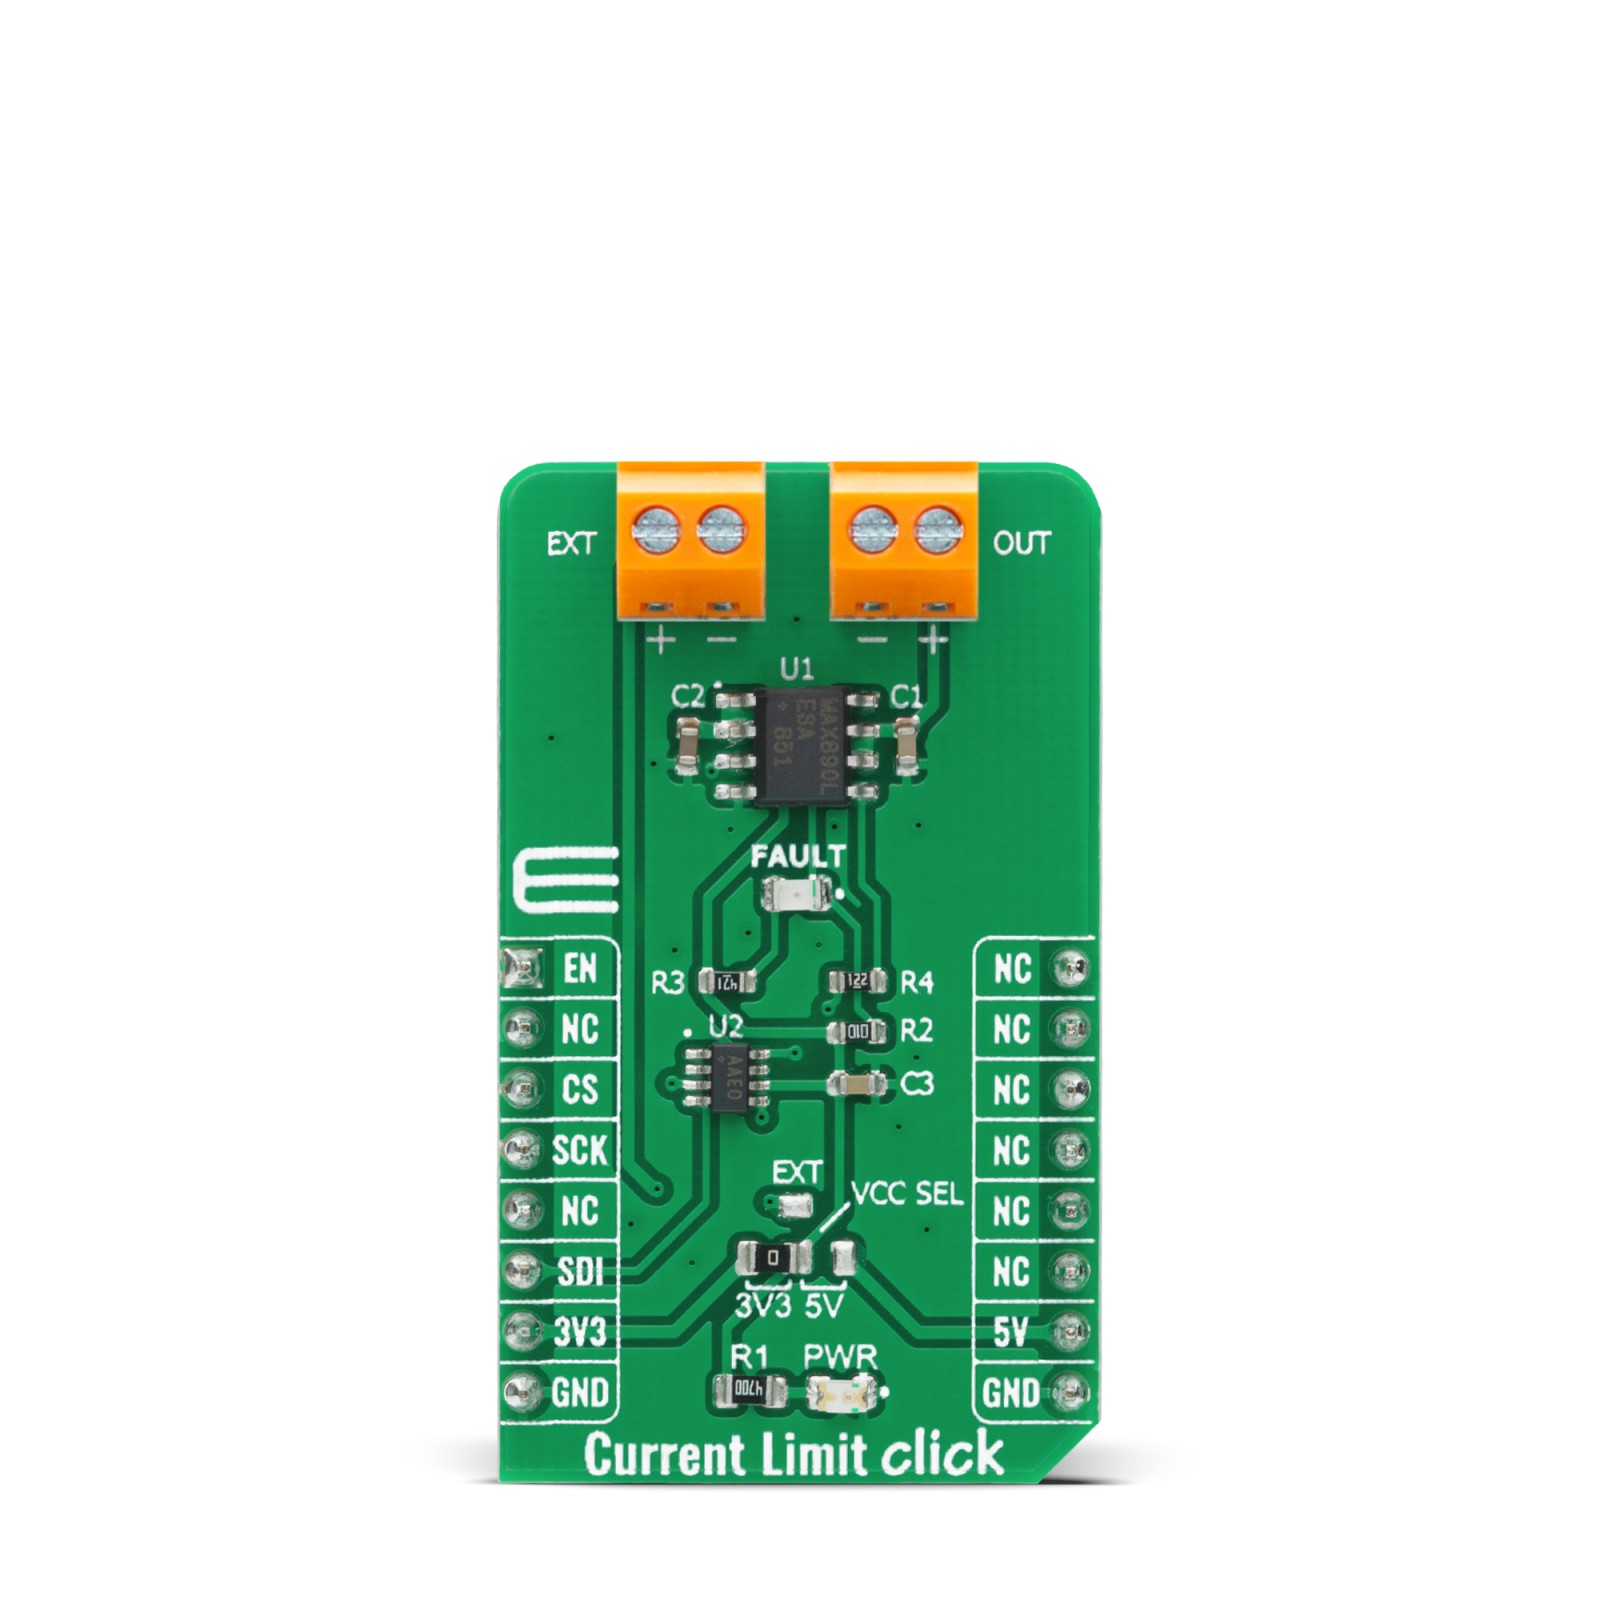
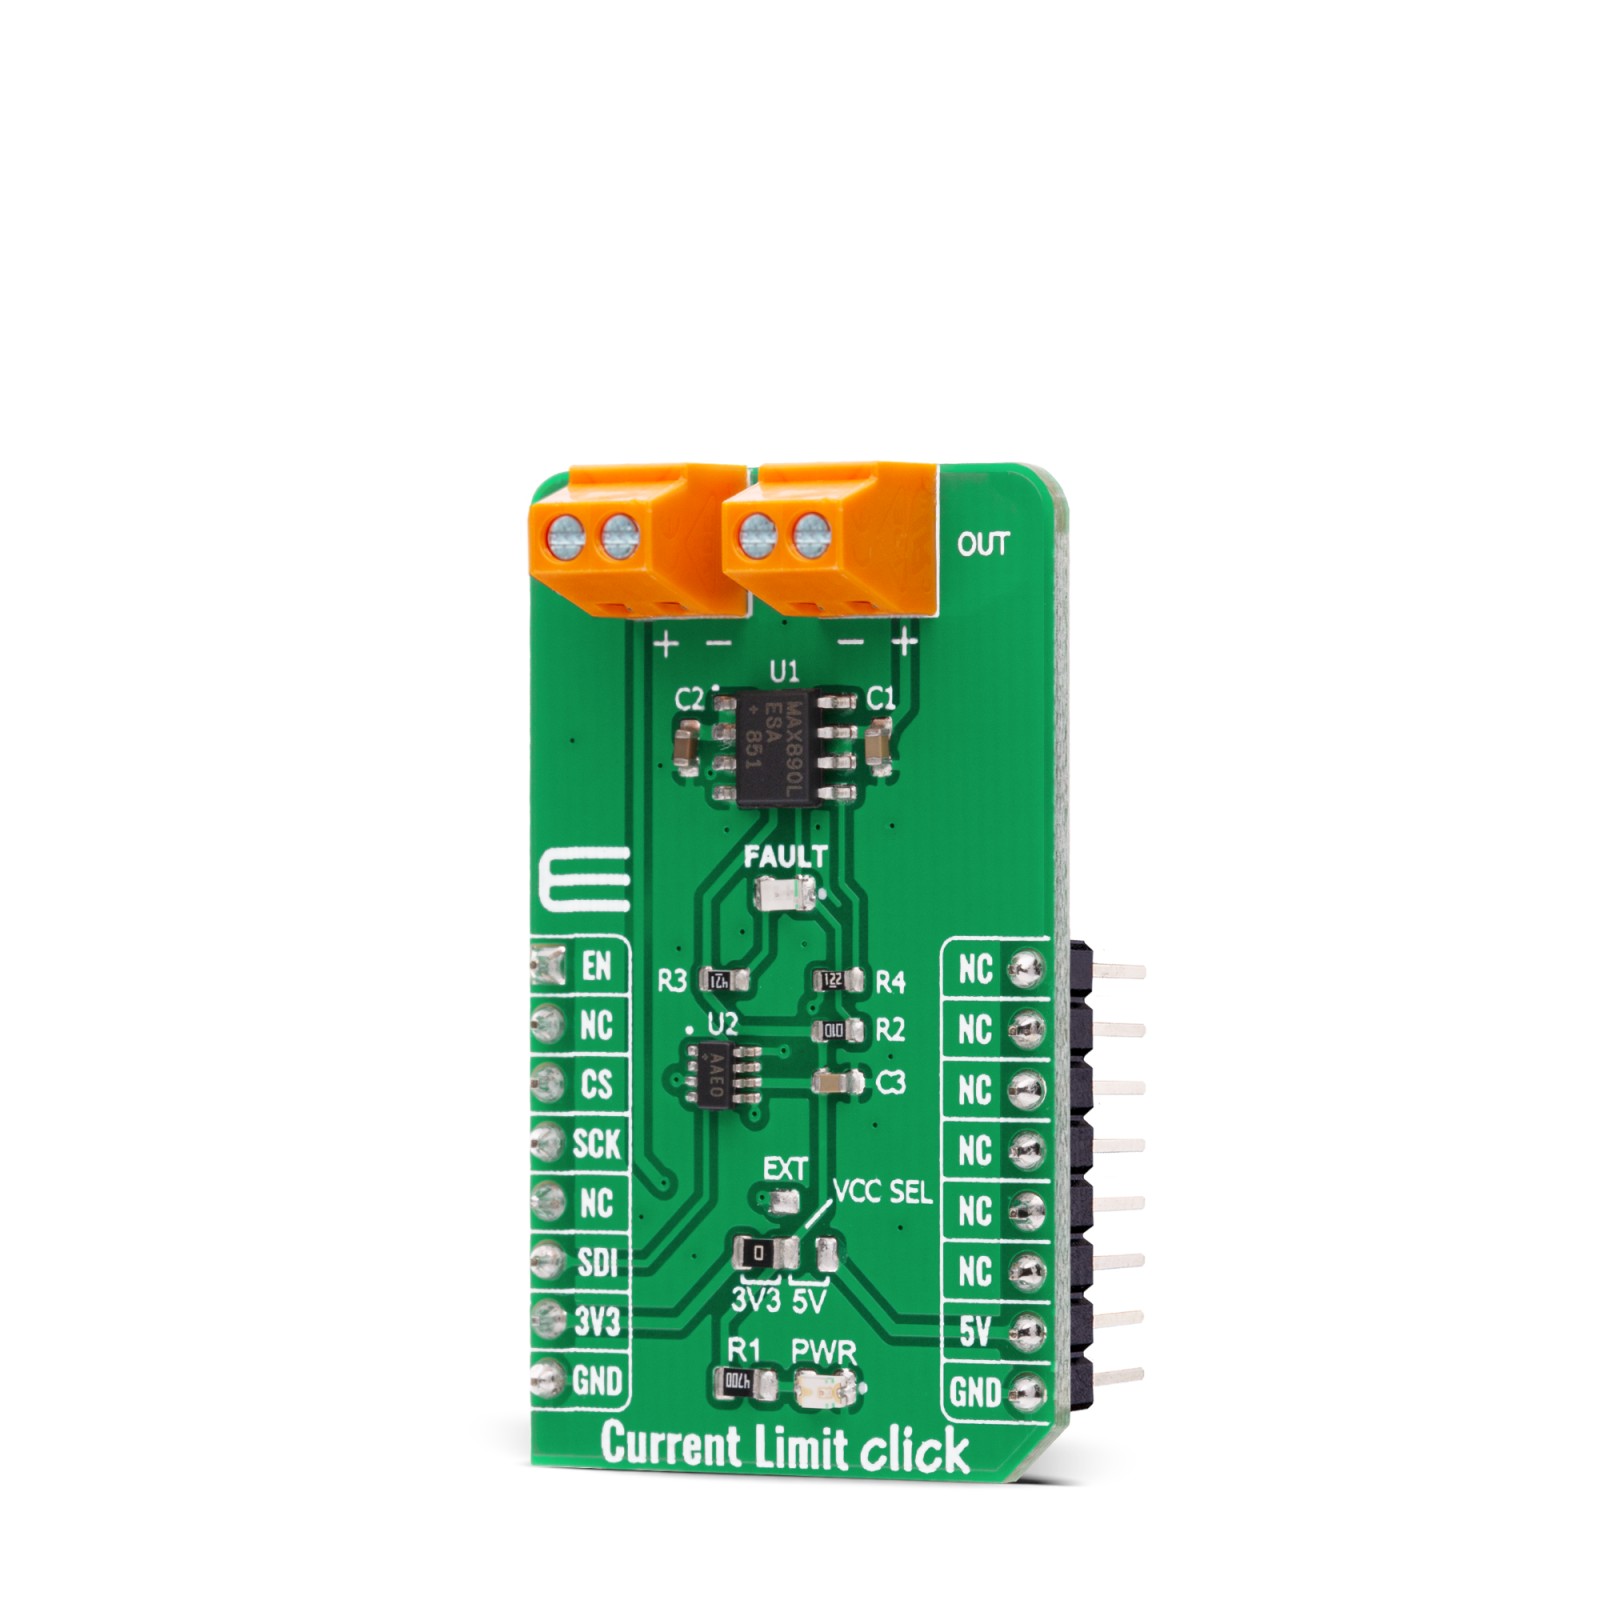
Current Limit Click is based on the MAX890L, a high-side low-resistance P-channel switch with the adjustable, accurate current limit system, and thermal shutdown from Analog Devices. The MAX890L limits the output current to a programmed level. When the output current is increased beyond the programmed current limit (1.2A), the current also increases through the internal replica amplifier along with the resistance applied on the SET pin. The current-limit error amplifier compares the voltage across the SET pin resistance to the internal +1.24V reference and regulates the current back to the lesser of the programmed limit (1.2A). This switch is not bidirectional, which means the input voltage must be higher than the output voltage.
The current-limit switch is virtually ubiquitous in system control, and provide a safe means for regulating the current delivered to a load circuit. It allows the load current to increase to a programmed limit but no higher. Typically, the current limit is a function of the voltage across an external resistor, and this voltage serves as the reference for an internal current-limiting amplifier. By replacing the resistor with a digital potentiometer, you can easily program the current limit as performed on this Click board™. For this purpose, the digital potentiometer MAX5401 from Analog Devices that communicates with the MCU via 3-Wire SPI serial interface is used to set the resistance on the SET pin of the MAX890L, and thus adjust the current limit for the switch.
The MAX890L provides an open-drain fault output with a red color LED, labeled as FAULT used to indicate when current reaches its limit or when the temperature exceeds +135°C. Besides the fault-indicator pin, the MAX890L also has an active-low Switch-On pin labeled as ON pin of the mikroBUS™ socket used to enable and turn the switch on.
This Click board™ is designed to be operated with both 3.3V and 5V logic voltage levels that can be selected via the VCC SEL jumper. Additionally, there is a possibility in this selection that as a source of logical voltage level, a voltage from an external input terminal in the range from 2.7 to 5.5V can be used. In this way, whether using a logic voltage level from mikroBUS™ or an external voltage supply, this allows for both 3.3V and 5V capable MCUs to use the SPI communication lines properly.
Specifications
Type
Power Switch
Applications
Can be used for applications in some portable equipment, access bus slots, or with power supplies, protecting them in cases of a short circuit or other overload conditions.
On-board modules
Current Limit Click is based on the MAX890L, a high-side low-resistance P-channel switch with the adjustable, accurate current limit system, and thermal shutdown from Maxim Integrated.
Key Features
Low power consumption, programmable current limit, thermal shutdown, fault indicator output, low quiescent current, and more.
Interface
SPI
Feature
No ClickID
Compatibility
mikroBUS™
Click board size
M (42.9 x 25.4 mm)
Input Voltage
3.3V or 5V,External
Pinout diagram
This table shows how the pinout on Current Limit Click corresponds to the pinout on the mikroBUS™ socket (the latter shown in the two middle columns).
Onboard settings and indicators
Label | Name | Default | Description |
---|---|---|---|
LD1 | PWR | – | Power LED Indicator |
LD2 | FAULT | – | Fault LED Indicator |
JP1 | VCC SEL | Left | Power Supply Voltage Selection 3V3/5V/EXT: Left position 3V3, Right position 5V, Top position External Voltage |
Current Limit Click electrical specifications
Description | Min | Typ | Max | Unit |
---|---|---|---|---|
External Supply Voltage | -0.3 | – | 6 | V |
Maximum Output Current Limit | – | 1.2 | – | A |
Operating Temperature Range | -40 | – | +85 | °C |
Software Support
We provide a library for the Current Limit Click on our LibStock page, as well as a demo application (example), developed using MikroElektronika compilers. The demo can run on all the main MikroElektronika development boards.
Library Description
The library covers necessary functions that enables the usage of the Current Limit click board. User can check or set current limit or enable/disable the device.
Key functions:
void currentlimit_dev_enable ( uint8_t state );
– Function is used to enable or disable the device.void currentlimit_set_limit ( uint8_t lim_val );
– Function is used to set the current limit with predefined values.void currentlimit_set_limit_calc ( float lim_val );
– Function is used to set the current limit with calculacion.
Examples description
The application is composed of three sections :
- System Initialization – Initializes SPI module, LOG structure, sets CS and AN pins as output.
- Application Initialization – Initalizes SPI driver and enables the device.
- Application Task – This example shows capabilities of Current Limit Click board by reading users input from USART terminal and using it as an index for an array of pre-calculated values that define current limit level(consult “Values definitions”).
- Values definitions – By using calculation from datasheet for MAX890 ( 6th page ) the following values were derived: 1 – 223 – 0.1A 2 – 241 – 0.2A 3 – 247 – 0.3A 4 – 250 – 0.4A 5 – 252 – 0.5A 6 – 253 – 0.6A 7 – 254 – 0.7A 8 – 255 – 0.867A
void application_task ( ) { char inx; if ( UART_Rdy_Ptr() ) { inx = UART_Rd_Ptr( ); inx -=48; currentlimit_set_limit( lim_val[ inx - 1 ] ); mikrobus_logWrite("Data sent successfully!", _LOG_LINE ); } }
The full application code, and ready to use projects can be found on our LibStock page.
Other mikroE Libraries used in the example:
- SPI
- UART
Additional notes and informations
Depending on the development board you are using, you may need USB UART click, USB UART 2 click or RS232 click to connect to your PC, for development systems with no UART to USB interface available on the board. The terminal available in all MikroElektronika compilers, or any other terminal application of your choice, can be used to read the message.
mikroSDK
This Click board™ is supported with mikroSDK – MikroElektronika Software Development Kit. To ensure proper operation of mikroSDK compliant Click board™ demo applications, mikroSDK should be downloaded from the LibStock and installed for the compiler you are using.
For more information about mikroSDK, visit the official page.